
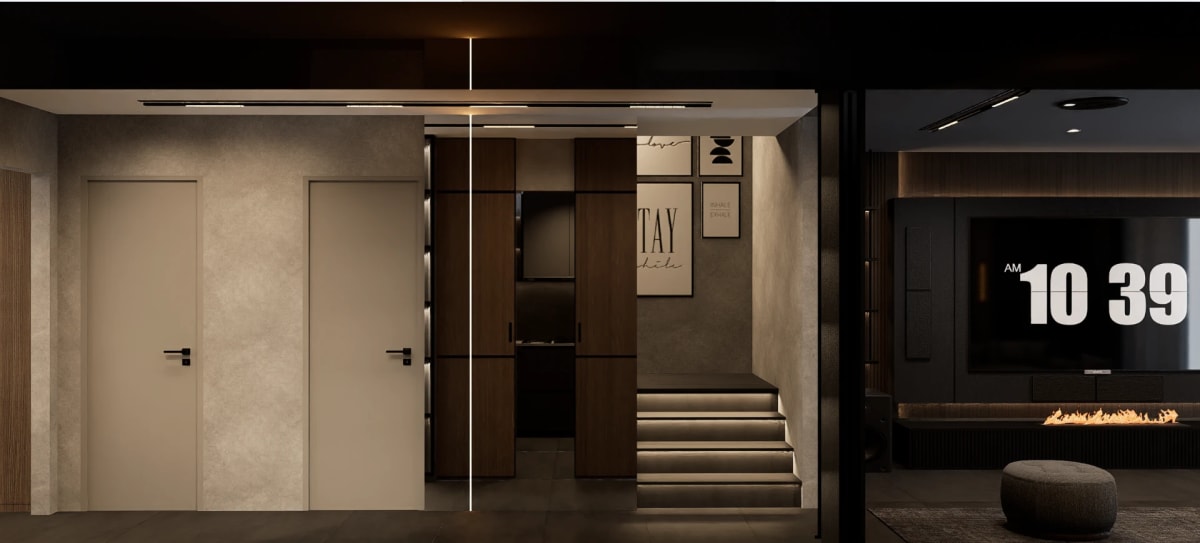
A cabinet can be beautifully made and still look flat after sunset. Once light is built into the joinery itself, a wardrobe becomes a display, a shelf becomes a gallery wall and a kitchen run reads as architecture rather than storage. Integrated lighting in bespoke joinery is where carpentry, electrical design and interior styling have to agree on every millimetre. In UAE homes, where clients are happy to dubai-it and ask for a lit headboard, a glowing bar and a backlit onyx wall in the same villa, that agreement matters more than ever.
What Integrated Lighting in Bespoke Joinery Means
Integrated lighting means the light source, its housing, its wiring and its control are designed into the furniture rather than added afterwards. Instead of a surface strip stuck under a shelf, the LED (light-emitting diode) tape sits in a routed channel or aluminium profile behind a diffuser that finishes flush with the surface. The driver is housed in a ventilated, accessible void, and the cable routes are drilled during manufacture.
The scope is broad. It covers shelf and niche lighting, wardrobe and dressing room lighting triggered by door or motion sensors, under-cabinet task lighting in kitchens, backlit panels in stone, glass or fabric, cove lighting along bulkheads and plinths, and accent lighting inside display cabinets and bars. What unites them is that light and joinery are drawn, fabricated and installed as one item. That is why the work sits best with a team that handles bespoke joinery from design through manufacture, rather than being left for an electrician to resolve once the cabinets arrive.
What UAE Interiors Ask of Lit Joinery
UAE villas are planned around hosting. A majlis, formal dining room or open-plan family space is often busiest late in the evening, and joinery lighting is what gives those rooms depth after dark: illuminated niches for incense burners and ceramics, softly lit shelving behind a sofa, a glowing bar cabinet that draws guests to one end of the room. In large open-plan layouts, lit joinery also helps define zones without adding walls.
The climate shapes the detail. Homes run air conditioning almost constantly, so joinery sits in cool, dry rooms beside warmer, more humid kitchens, bathrooms and terraces. Drivers produce heat, LED tape loses performance when it runs hot, and a sealed cabinet can trap that warmth against veneer and lacquer. Lighting also plays into prestige and resale value. Buyers in prime communities notice when a dressing room or display wall glows evenly with no visible dots or cables, and that level of finish is clear in the illuminated shelving in one of our recent villa projects.
Integrated Lighting Ideas for Bespoke Joinery
Illuminated Shelving and Display Niches
Recessed linear lighting along the front or back edge of each shelf turns a bookcase into a curated display. Front-edge lighting washes the objects themselves, while back-edge lighting grazes the rear panel and gives each piece a soft halo. Glass shelves can carry light through the full height of a unit, whereas solid timber shelves need the profile routed into the underside so the source stays hidden from a seated eye level.
Wardrobe and Dressing Room Lighting
In wardrobes, light should fall on the clothes, not into the eyes. Vertical profiles set into the side panels, or lit hanging rails, give even illumination down the length of each garment. Door-activated or motion sensors mean the light comes on only when needed, which keeps heat and energy use down. A warm-white source with a high colour rendering index (CRI) helps fabrics look true to colour.
Under-Cabinet and Kitchen Task Lighting
Under-cabinet lighting is the hardest-working light in a villa kitchen. A profile recessed into the cabinet underside and set towards the front edge throws light across the worktop instead of onto the backsplash, which avoids glare on polished stone. Plinth lighting at floor level gives tall units a floating appearance and doubles as a gentle night light for late-evening visits to the kitchen.
Backlit Panels and Feature Walls
Translucent onyx, fluted glass, sandblasted acrylic and stretched fabric can all be backlit within a joinery frame. The key is a consistent depth between the light source and the panel, so the surface glows evenly without bright stripes or dark corners. These panels work well as bar fronts, headboards and majlis feature walls, especially when framed in a slim timber or metal trim.
Cove and Reveal Lighting
A shadow gap between full-height joinery and the ceiling, or a reveal along the top of a wall unit, can conceal an upward-facing strip that washes the ceiling. This softens the visual mass of tall cabinetry and makes it feel lighter, which is valuable in bedrooms and media rooms where overhead downlights can feel harsh.
A Practical Framework for Lit Joinery Projects
Light behaves differently on every surface, so it helps to understand how veneer, lacquer and high-pressure laminate (HPL) finishes respond before fixing the lighting details. A well-run project follows this sequence:
- Discovery. Establish how each room is used, which pieces should be lit, the mood required and how the client wants to control it, whether by switch, dimmer, sensor or smart-home scene.
- Survey. Measure the site and confirm wall construction, power points, ceiling voids and ventilation paths, so drivers and cable routes have somewhere sensible to go.
- Design. Detail every profile, diffuser, driver location and access panel in the shop drawings, and coordinate them with the MEP (mechanical, electrical, and plumbing) drawings as part of the wider interior design and build scope.
- Materials. Select LED tape by colour temperature, CRI and output, choose aluminium profiles that double as heat sinks, and specify MR-MDF (moisture-resistant medium-density fibreboard) carcasses where joinery sits near wet areas.
- Fabrication. Rout channels, drill cable routes and form driver voids by CNC (computer numerical control) machining, then dry-fit and test the lighting in the workshop before finishing.
- Installation. Fix the joinery, connect it to the prepared supply and set dimming and sensor levels on site under real room conditions.
- Handover. Demonstrate the controls, label drivers and access panels, and provide a lighting schedule so any future replacement matches the original specification.
Common Challenges and Solutions
Heat build-up inside closed cabinets.
Mount tape on aluminium profiles, place drivers in ventilated voids away from the lit compartment, and leave concealed air gaps so warmth can escape rather than settle against the finish.
Humidity near kitchens, bathrooms and terraces.
Use LED tape with a suitable ingress protection (IP) rating, MR-MDF carcasses and sealed cable entries, and allow for the temperature difference between air-conditioned rooms and the spaces next to them.
Hot spots and uneven glow.
Set the correct depth between source and diffuser, use higher-density tape, and test on the actual finish, since gloss lacquer reflects far more than matt veneer.
Colour mismatch with ceiling lighting.
Agree a single colour temperature and binning standard across the whole lighting schedule, and source joinery tape to that same specification.
Components that cannot be reached.
Design magnetic or clip-fixed access panels into the drawings from the outset, so replacing a driver never means dismantling the unit.
Frequently Asked Questions
Can lighting be added to existing joinery later? Surface-mounted options can be retrofitted, but a truly integrated result needs channels, cable routes and driver space designed in during fabrication.
Which colour temperature works best for joinery lighting? Warm white, around 2700K to 3000K, suits most residential spaces. Slightly cooler tones can work in kitchens, dressing rooms and retail displays where colour accuracy matters most.
Does LED lighting damage timber or veneer finishes? LEDs emit very little ultraviolet light, so fading is minimal. The real concern is heat, which is managed through aluminium profiles, ventilation and remote driver placement.
Can joinery lighting connect to a smart-home system? Yes. Drivers can be specified to work with common dimming and home automation protocols, so lit joinery joins room scenes alongside ceiling lights and AV (audio-visual) equipment.
What happens if an LED strip fails? With accessible drivers and clip-in diffusers, a strip can be replaced without removing the joinery, and the handover lighting schedule makes matching the original straightforward.
Is integrated lighting suitable for commercial interiors? It is widely used in reception desks, retail displays, hotel rooms and bars, where it guides the eye and reinforces brand character.
Light That Belongs to the Furniture
When light is drawn, made and tested together with the joinery, the result feels calm and deliberate: no cables, no glare, no dots, just surfaces that glow exactly where they should. Integrated lighting in bespoke joinery rewards early decisions, careful material choices and a team that understands both the timber and the wiring behind it. If you are planning a villa, apartment or commercial interior and want light to be part of the furniture rather than an afterthought, Hammer Group can take it from first sketch to a finished, lit installation.